DIY Tips on Tie-Dying a Shirt

DIY projects are a fun way to bond with your kids, your friends, or any other group of people. These hands-on experiences are personal and memorable, and always bring smiles to everyone’s faces. One common project is to tie-dye something yourself, so that you have tons of fun doing it and have a cute shirt to remember your good times by. Here is how to get started on this fun project!
Find a Shirt
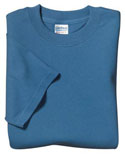
The beauty of a lot of DIY projects is how inexpensive it is, which applies to this case, too. When looking for a piece of clothing to tie-dye, go for a cheap and plain one. You can choose to buy one or use an old shirt you already own. You don’t want any patterns on it, so that you can create your own later on. White is the preferred color so that the colors show easily, but any other light or pastel color would work as well. For the best results, 100% cotton shirts used for the end product will be brighter and more vibrant. This is the easy part; now we need to get on to the fun part of the project.
Find Some Dye
There are many ready-to-use kits available for tie-dying shirts, and, if your prefer those, they can easily be purchased online or at your local arts and crafts shop. However, if you want to make your project extra personal, you can make your own dye. The best way to do that is to use food coloring, since it stains clothes very well and is safe to wear. For every half cup of water, you add 8 drops of the food coloring of your choice—it’s that easy! For stronger or lighter colors, just add 2 extra or 2 fewer drops of food coloring to your mixture. After you’re done creating your dyes, just pour them into squirt bottles or empty shampoo bottles for later.
Getting Your Shirt Ready
To prepare your shirt for dying, place it in a plastic bowl or container and soak it in a soda ash mixture. If you bought a tie-dye kit, it is likely to have come with soda ash. However, it can also be bought separately at a craft store. Let this soak for thirty minutes while you prepare the dye. Use lukewarm water for the dyes to be the most effective. The shirt should be evenly damp when it comes time for you to start dying it.
Choosing a Pattern
DIY projects are the best way to express your creativity, and there are endless kinds of patterns you can create. Creating a pattern on your shirt is simple, and it all depends on how you scrunch, twirl, tie, and pinch your shirt. You can use rubber bands to hold it in place. To create circular patterns, all you have to do is tie little knots on the shirt and secure them with rubber bands. You can even fold the shirt in different ways to make different designs.
Your design also depends on the type of shirt you use. If you use a long sleeve shirt, you can create rings or other patterns on the sleeves. With tank tops or t-shirts, perhaps you can focus the designs on the collar area. These can easily be found online if you’re not feeling very inspired. Let your imagination run wild!
Dying Your Shirt
This is where it starts to get a little messy, so it would be a good idea to put your hair up, wear some gloves, and an apron or old clothes you don’t mind getting a little dirty. Place your tied-up or bunched-up shirts on your workstation, which could be outside or on a drying rack to avoid staining anything.
Squirt the dye onto the desired parts of the shirt until you’ve covered it in all the colors you want. You can leave some white parts if that’s how you prefer the design. When you’re done, put the shirt in a sealed plastic bag overnight.
The next day, rinse your shirt in salt water several times until the water is clear and the dye stops leaking, and then let it dry. And there you have your very own tie-dyed shirt! This kid- friendly activity is a classic, and very easy to do. It’s a cheap and guaranteed way for a day of fun and laughs.


